Springtime Quiche with Scapes, Chard, and Leeks
Garlic scapes, Leeks, Swiss Chard- three of my springtime favorites. What’s really great about this recipe is that it serves up crops that a) pair perfectly together, flavor-wise, and b) use crops that our CSA members often feel like the need a little guidance to know how to use.
Garlic Scapes can be intimidating in their uniqueness but your chances to use them are so rare and fleeting, don’t be daunted, or you’ll miss your once-per-year shot at making something truly unique and spectacular with them. Leeks are perfect in this dish because their mild flavor doesn’t overpower the other items, but compliments them perfectly. Swiss Chard is a fantastic green in the same family as Beets and Spinach. The flavor is extremely similar to spinach, and if you get chard leaves small and tender enough, it works perfectly in place of spinach in a raw salad. When you know how things are related, they can be used interchangeably or as companions in the kitchen. It’s pretty fun. There’s a fantastic cookbook on this theme called Vegetable Literacy by Deborah Madison. You should check it out!
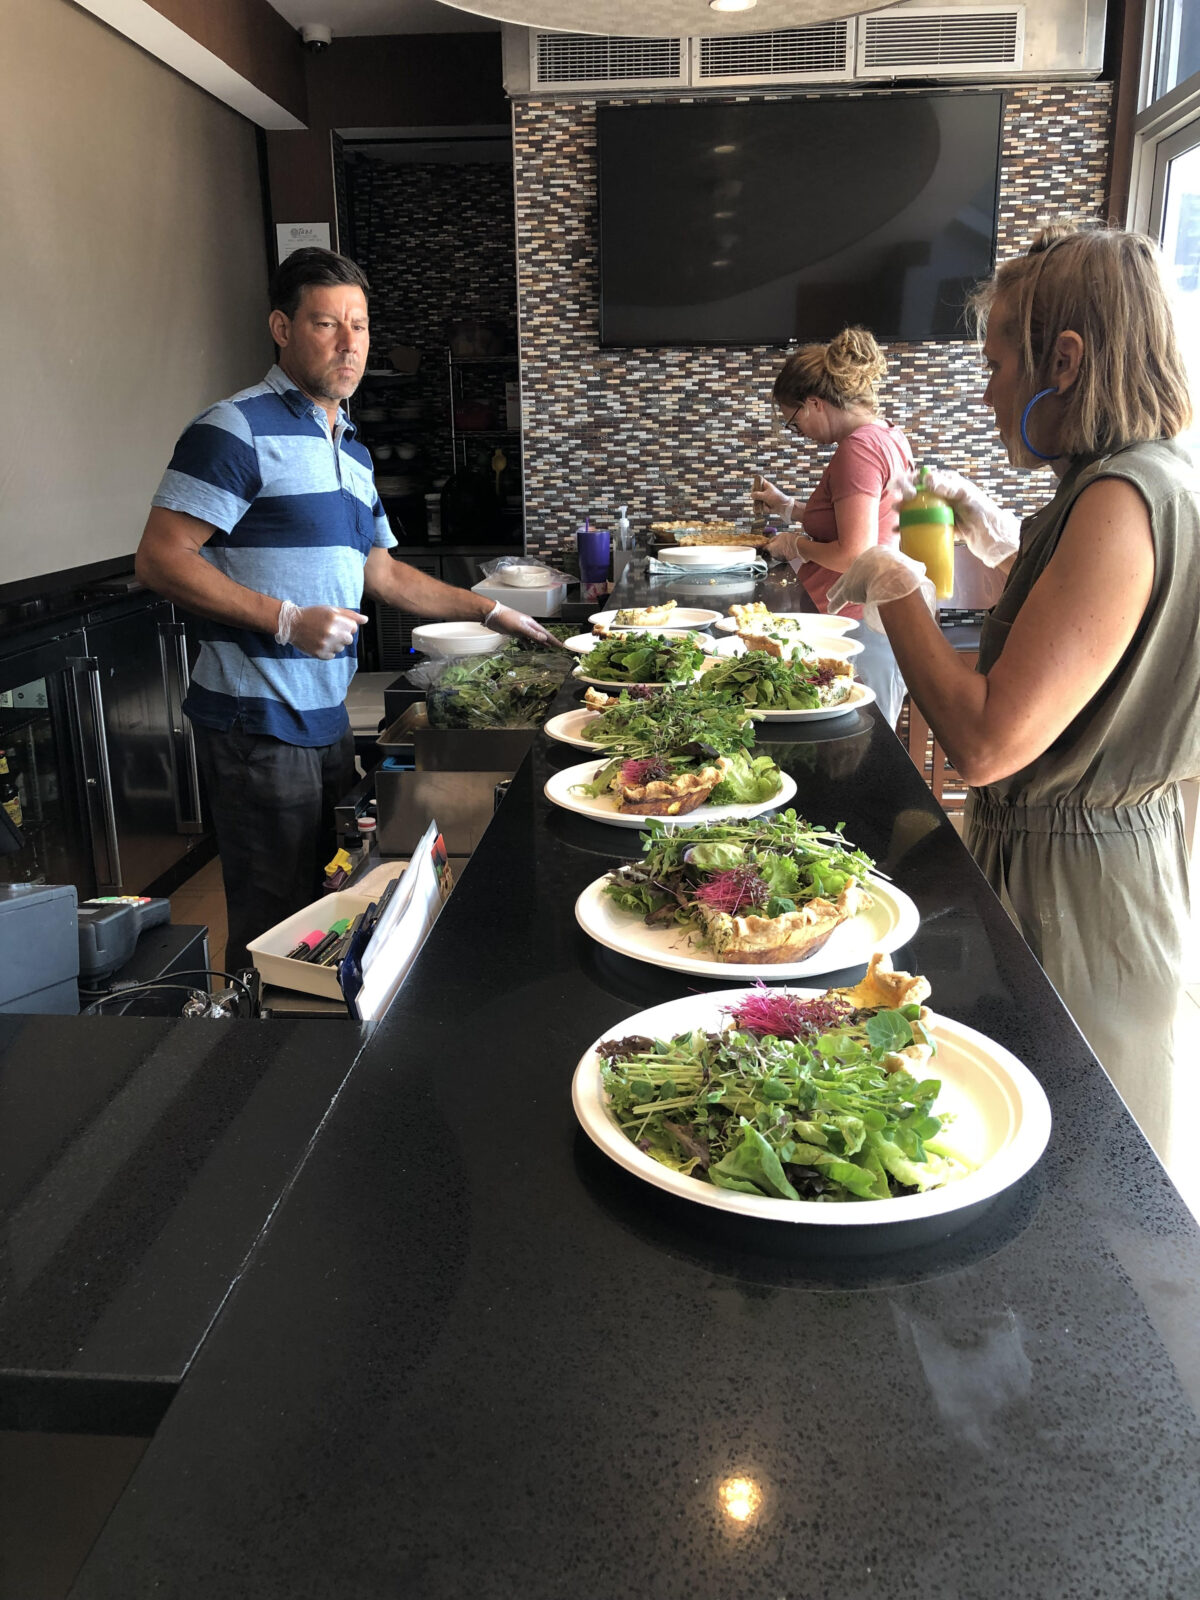
We were recently invited to prepare a farm to table luncheon for a delegation from the Texas Department of Tourist and the Department of Agriculture. They were paying a visit to the Van Zandt Cultural Arts District to provide their recommendations on tourism development here in Van Zandt County, and the folks leading this gathering were so gracious to think of Red Moon Farm as an asset to show off to this group. (lucky us to get to serve this meal and show them what ETX Farms can do!)
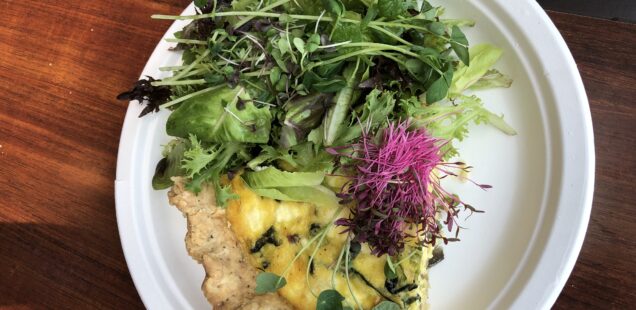
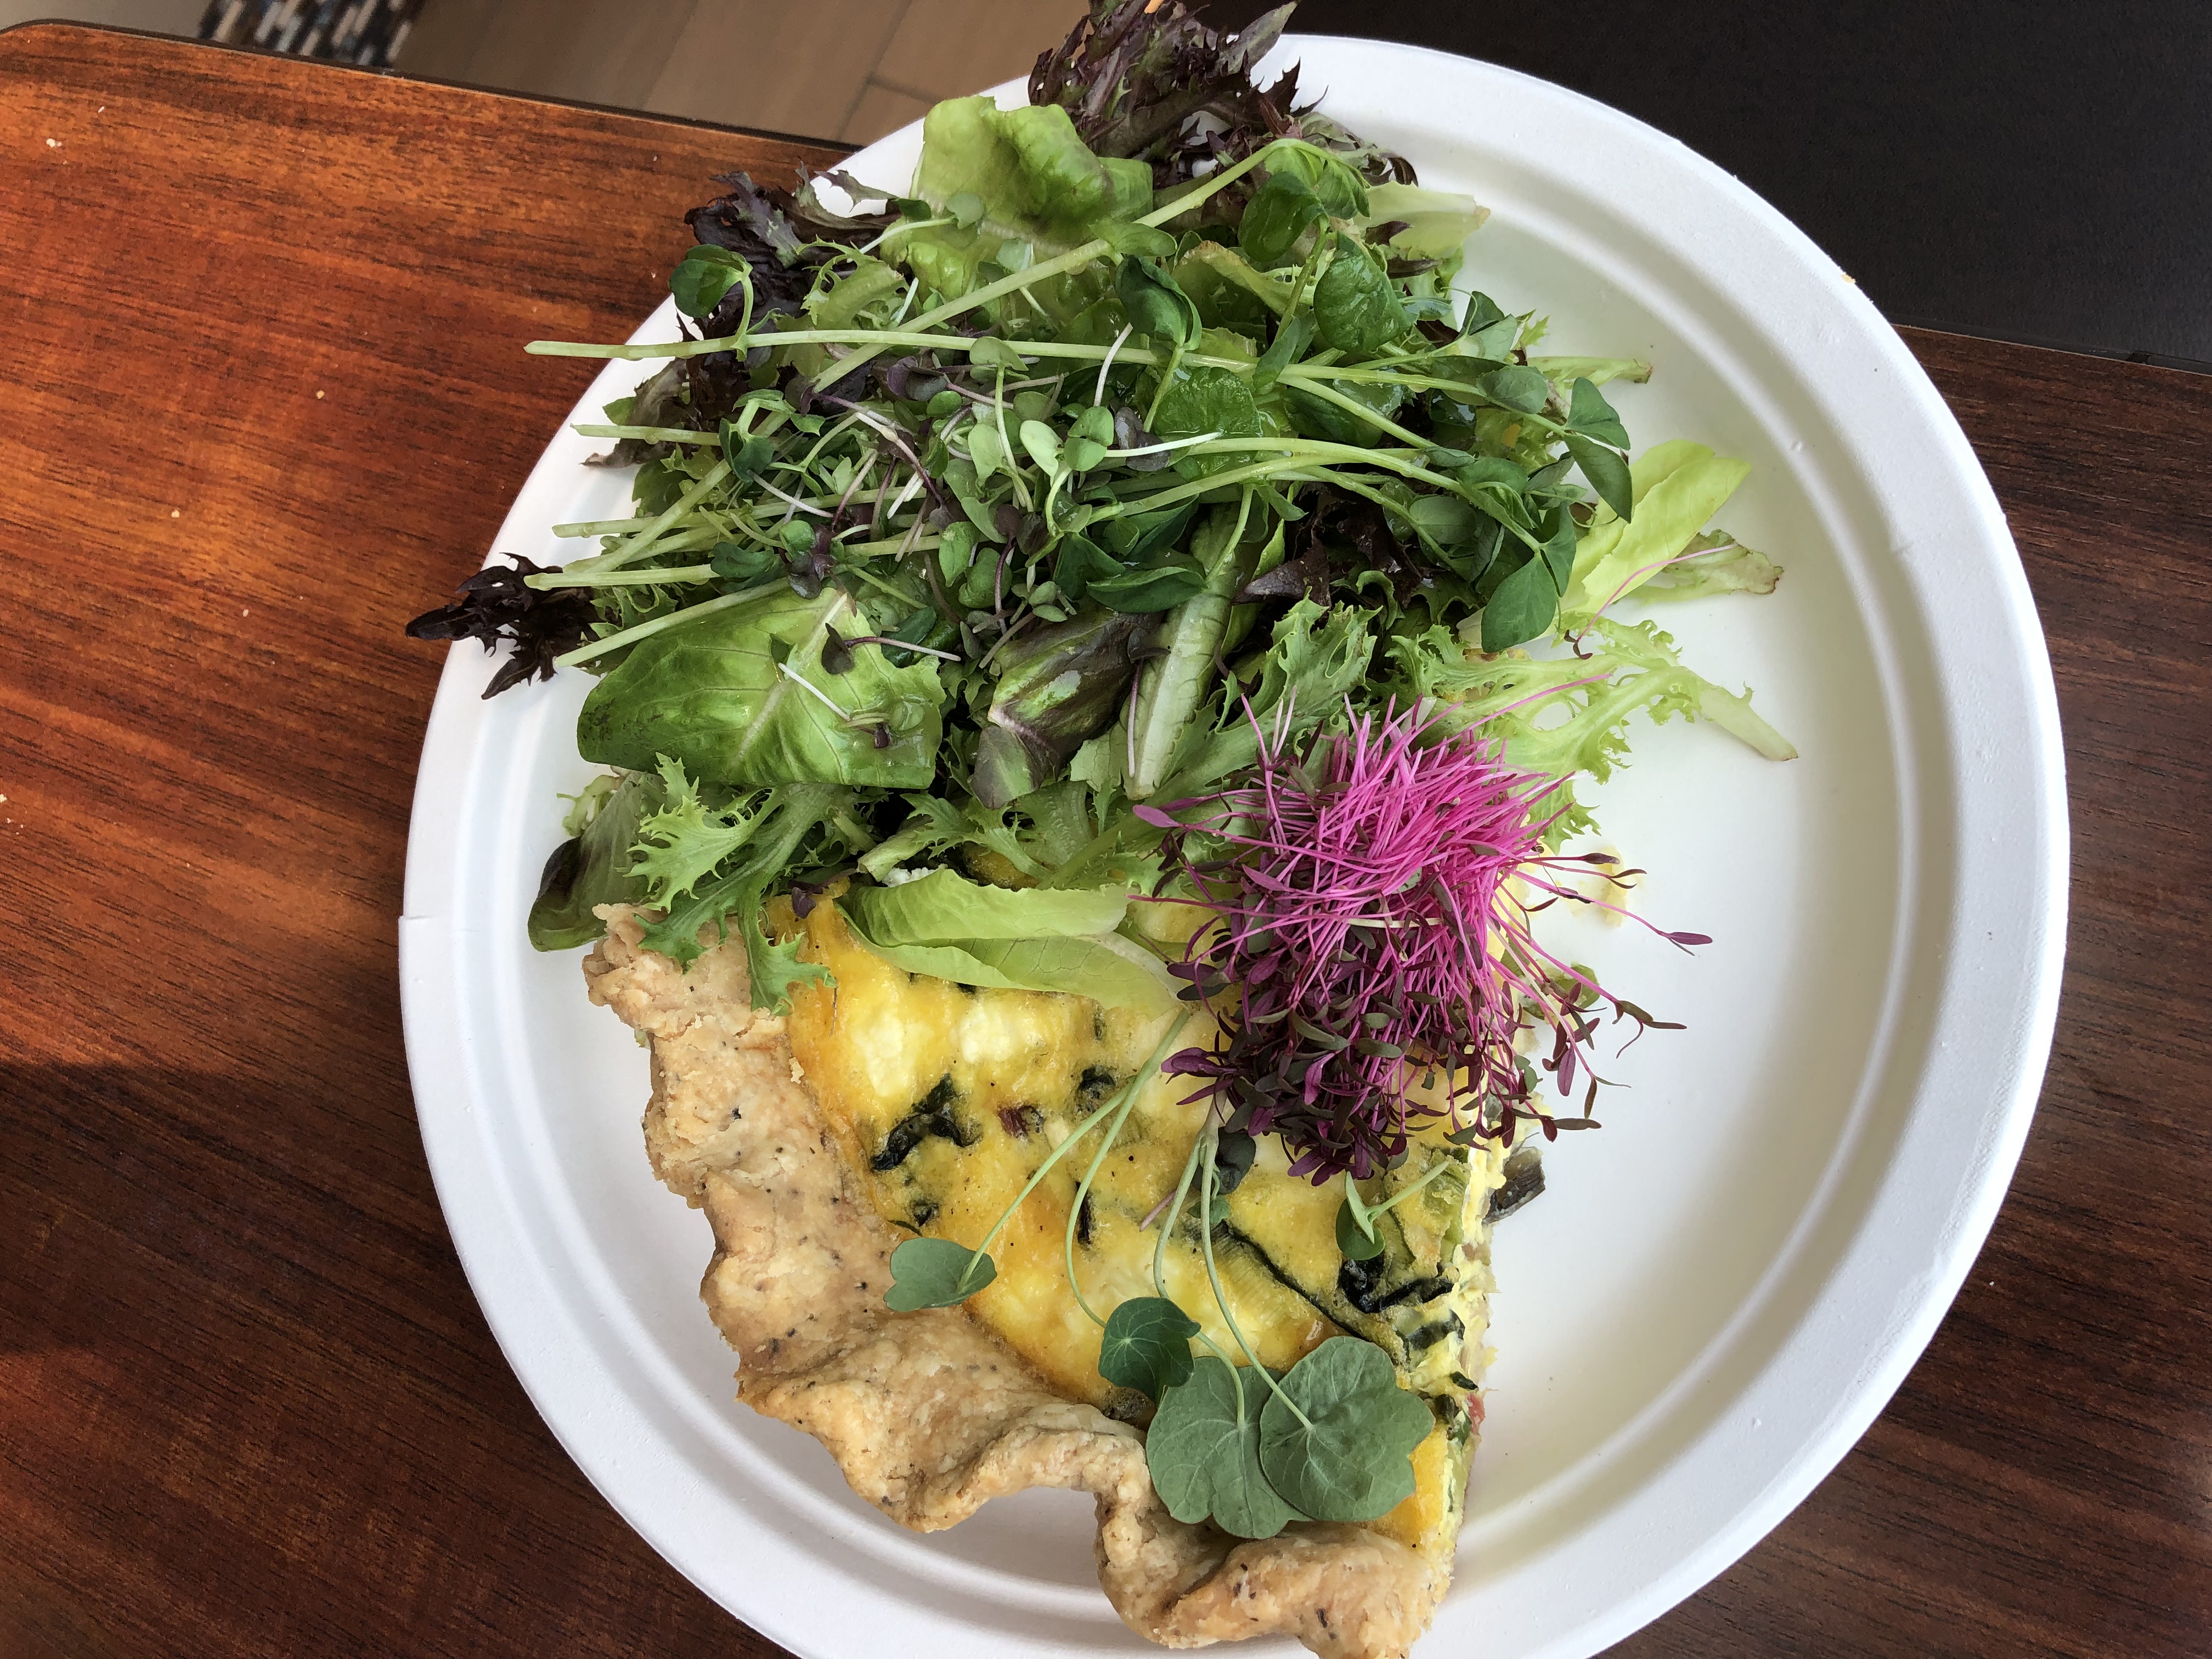
This quiche was a feature of the meal, and paired with a beautiful salad and microgreens from Terra Sana Farm (awesome spot in Ben Wheeler, check them out!), it was hearty enough to make a great meal. Complimented with strawberry mint tea and finished off with a strawberry sorbet, all were satiated but not overly stuffed. Perfect for the heat wave that came through the month of May.
This quiche uses my family’s perfect all-butter pie crust recipe. Homemade crust is a labor of love and requires a pretty specific technique (I explain is minute detail!), but the end result is so luxurious, so melt-in-your-mouth that it’s all worth it. If you need a crust tutorial, give me a shout. If you don’t want to tackle the crust, you can use store bought, for sure.
I try to keep all my recipes super adaptable so you can adjust to what you have ready in your own kitchen that week, so remember, substitution is the name of the game! Lots of things work splendidly here.
Black Pepper Pie Crust:
- 1 1/3 c. flour
- 1 stick of cold butter
- 3-4 Tbs **ice cold** water
- 1 pinch of salt
- 1 tsp black pepper
- You’ll also need: a pastry cutter, a rolling pin, waxed paper, parchment paper, and pie weights (1-2# of dry beans works great)
Quiche Ingredients:
- 1 bunch of Swiss Chard, stems chopped into 3/4 in pieces, greens coarsely chopped
- 1 leek, thin sliced
- 1/2-3/4 cup of scapes, in 1/2 inch pieces, cut on a bias
- 6 eggs
- 1 1/4 c whole milk
- 1/2 c. heavy cream
- a generous 1/4 tsp each of salt and pepper
- 4 oz crumbled goat cheese. We used Haute Goat creamery out of Longview
Crust Directions:
- In a bowl, whisk together your flour, salt, and pepper. Cut your stick of butter into several large chunks and add it to the bowl
- Using your pastry cutter, “cut” the butter into the flour until you have fairly even, pea-sized pieces.
- Sprinkle on 3 Tbs of ice cold water and cut it in with the pastry cutter. (Do not mix, stir, or knead, as you do not want to activate the gluten. If you do, you’ll end up with a tough crust rather than tender and flaky)
- Continue cutting until combined and the dough begins to form a large mass. Scrape the dough off of the cutter with a butter knife whenever needed. You can add up to 4 total Tbs of ice water in the crust is dry and not coming together.
- Using your hands, gently form a tight dough ball. Press all the extra dough crumbs together into the dough ball. (take care that you’re not kneading at this step! Flaky Crust!)
- Press the dough into a disk approximately 1 in. thick and wrap tightly with plastic wrap. Refrigerate for 30 min to 1 hr.
Roll out and pre-bake your crust
- Remove your dough from the fridge and unwrap it.
- Wet your counter with a damp rag and lay out a piece of waxed paper on it so it’ll stick. Sprinkle the counter and waxed paper with a generous dusting of flour. Flour your rolling pin and also the surface of the dough.
- Roll the dough, working from the middle, out, until your crust is approx. 1/4 in. thick and will fill a 9in pie pan. Sprinkle with flour as frequently as needed to keep from sticking to the rolling pin. **Never ever stretch or pull your dough.**
- Once I’m near done rolling, I can see where my oddly shaped (never perfectly round!) crust will likely not cover an edge of my pie pan. I may have large cracks that will need to be fixed. To do this I cut dough from one area that is rolled out too long and adhere it to an area that is too short, applying a tiny bit of ice water at the seam to make it stick. I dust over that with flower and gently roll it out and I can then get my end result to be more circle shaped.
- Once it’s near round and large enough, slide your hand and forearm under the waxed paper and quickly and gently invert the crust into your pie pan, centering it so it overlaps the rim on all sides. Peel away the waxed paper.
- Cut away any large overhang, leaving no more than 1 inch. Roll the crust edge under, and flute the edges.
- Prick the crust all over with a fork. You’ll want about 1 million tiny holes. This will allow steam to escape and help prevent shrinkage (Seinfeld!) or cave-ins.
- Freeze dough for 20-30 min (Do not skip this step! It also prevents shrinkage and cave-ins)
- Preheat your oven to 400. Once oven is preheated remove your crust from the freezer and place a large square of parchment on your crust. Pour in your pie weights (or 1-2# of dry beans), pushing most of the weights up the sides of the crust. This is going to support the walls of your crust to help your crust keep its shape while pre-baking.
- Bake for 15 min with the weights, then gently lift out the parchment and weights and bake for another 5 without. Now it’s ready to either fill, or cool completely to save for when you’re ready to bake your quiche.
You can make the crust a day ahead and store on the counter. Once cooled completely, cover with aluminum foil.
Quiche Directions:
- In a heavy cast iron pan on medium heat, with a drizzle of olive oil, cook your chard stems for about 3 minutes till beginning to soften. Add scapes, and cook till soft. Last, add greens and leeks and cook until tender.
- While the veggies cook, crumble your goat cheese and set aside (quick tip: if the cheese is partially frozen it’s easier to crumble and whisk together your eggs, milk, cream, salt, and pepper.
- In your pre-baked crust, spread your cooked veggie mixture evenly across the bottom. You should have approximately 1.5 cups of cooked veggies.
- Top the veggies with the crumbled cheese.
- Pour on the egg mixture
- Bake at 350 for 55-65 min until custard is set. Place foil on the crust rims if beginning to brown too much.
- Serve hot or cooled to room temperature
Serves 5-6. With a nice side salad, it’s a complete meal.